How to integrate LiteSpeed Cache into Drupal 8
Knowledgebase Article
Knowledgebase Article
Using LiteSpeed Cache in Drupal 8 for the best speed and optimization can be accomplished in a few steps. We will walk through them in this guide, but you can also check out our guide on integrating Redis in Drupal 8 for database/query caching.
1. Edit the .htaccess file to include these lines at the very top:
<IfModule LiteSpeed>
CacheLookup on
</IfModule>
There are many ways to edit your .htaccess file including over FTP or SSH, but the simpliest way may be in cPanel > File Manager. There you can navigate to the folder that contains your Drupal files and click to edit the .htaccess file in that folder.
2. Ensure LiteSpeed is enabled in cPanel > LiteSpeed Cache (see our guide here).
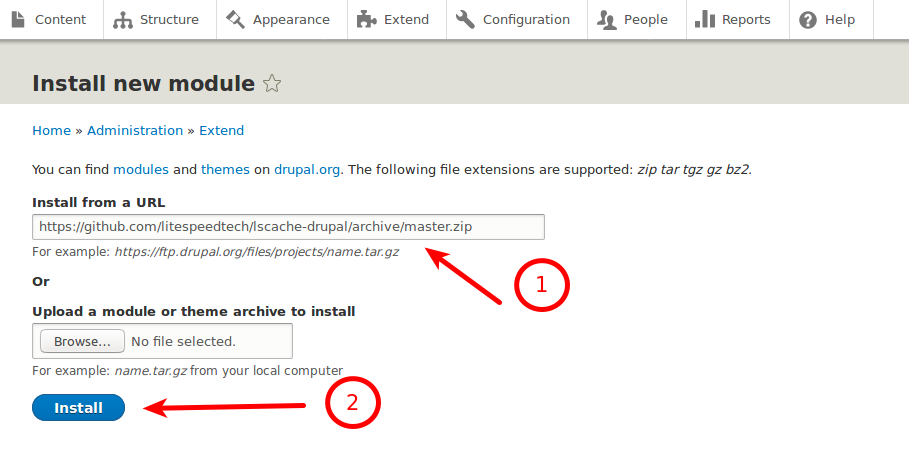
3. Log into the Drupal admin area and navigate to Extend > Install new module:

4. In the Install from a URL field, paste in this URL for the official Drupal 8 LiteSpeed Cache module:
https://github.com/litespeedtech/lscache-drupal/archive/master.zip

then click Install.
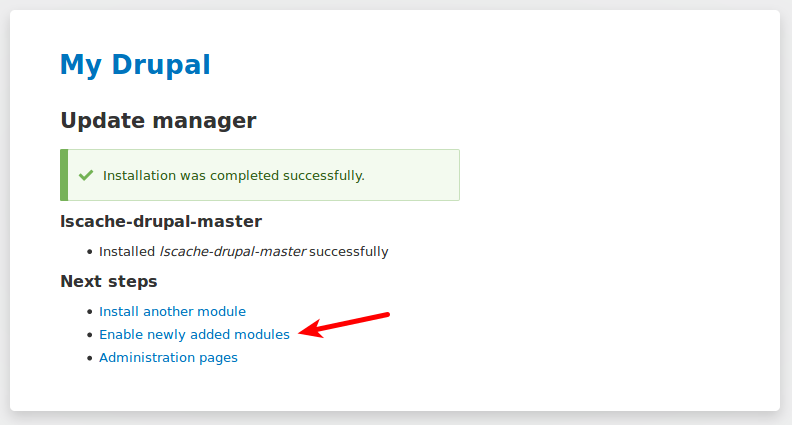
5. You should see an 'Installation was completed successfully' message. Click on Enable newly added modules below:

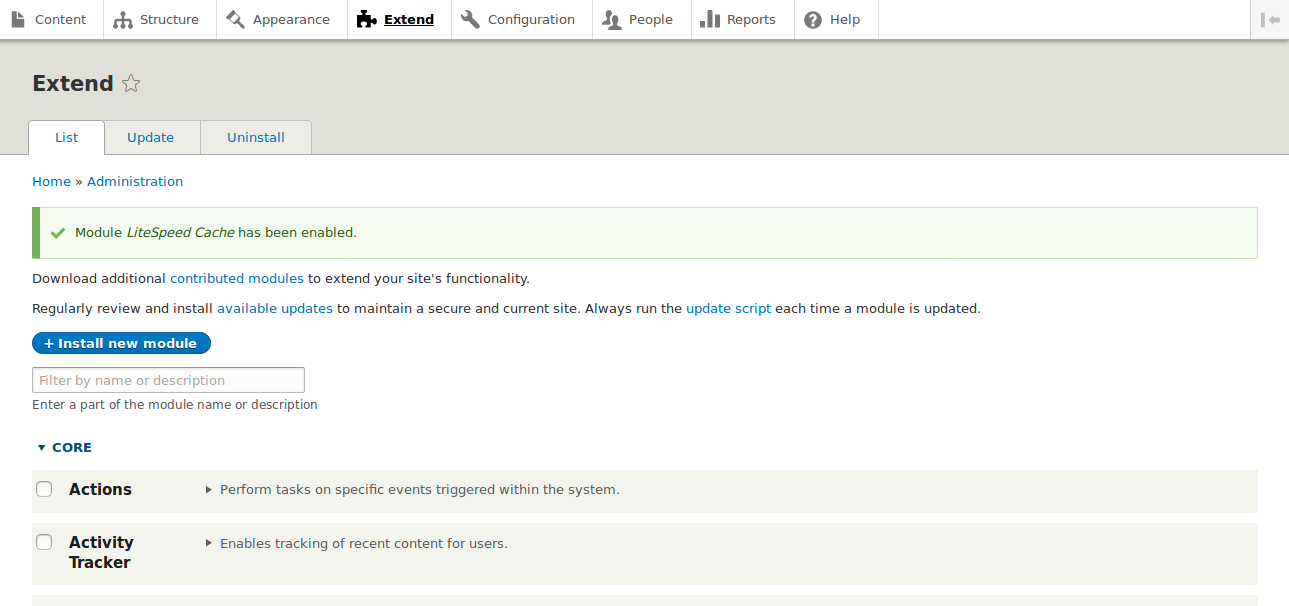
6. On the next page, search for the LiteSpeed module, check the box next to it, and click Install to finish:

You should then see a success message:

That concludes the steps to enable LiteSpeed Cache in Drupal 8!
To test if it is working, you can view the website's response headers using your browser's network tools:

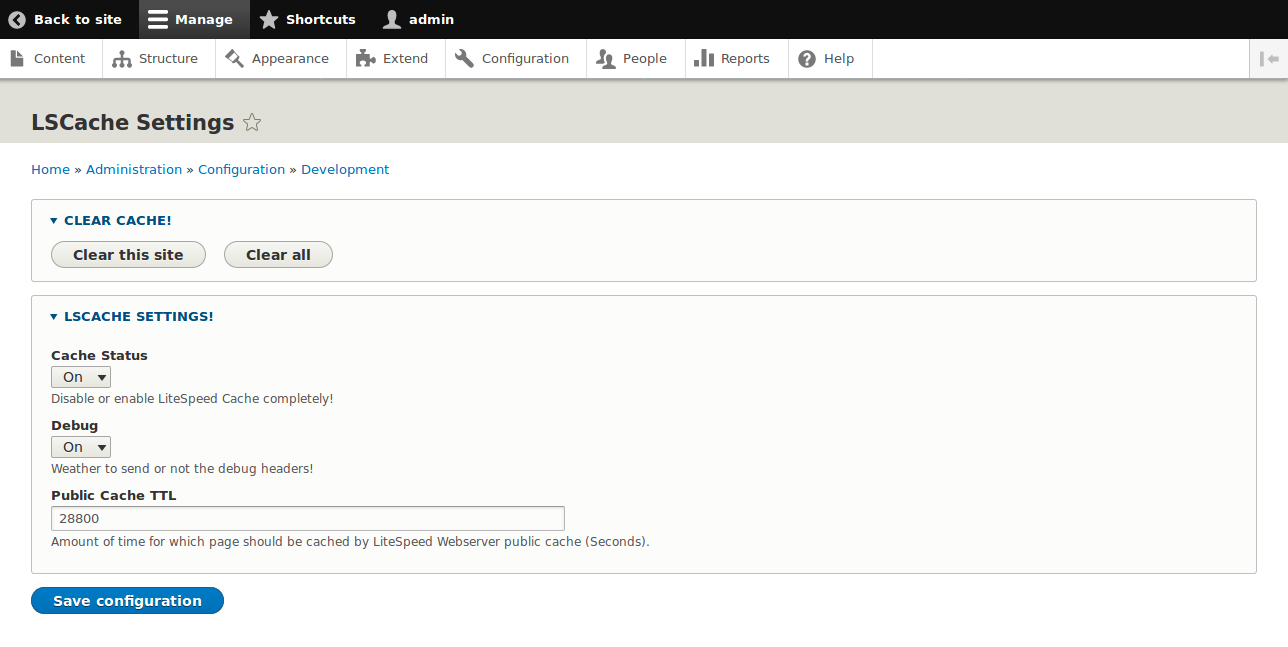
To configure advanced settings for LiteSpeed Cache in Drupal, you can navigate to Configuration > LSCache Settings:

There you can manually clear the cache, disable cache, enable/disable debugging, and change the public cache TTL (time before cache automatically expires in seconds).
Powered by WHMCompleteSolution