How to set up SMTP authentication in WordPress
Knowledgebase Article
Knowledgebase Article
By default, WordPress does not use SMTP authentication to send out emails.
That means any emails originating from WordPress (forgot-password emails, contact form submissions, and more) are sent using the default cPanel address. This is in the form of [email protected]. Emails from that address with a different 'From' header set may often get filtered into the recipient's spam folder or greylisted (delayed) by the recipient server.
This is where SMTP authentication comes in. Once that is set up in WordPress, emails will truly be sent from the address you use in the settings, leading to a higher chance of being delivered successfully and not in a spam folder.
Because WordPress does not yet have a native way to enable SMTP authentication, there are various plugins you can use to accomplish this. The one we will show you in this tutorial is called Easy WP SMTP:
https://wordpress.org/plugins/easy-wp-smtp/
Let's get started!
1) Login your WordPress dashboard and navigate to the Plugins > Add New page
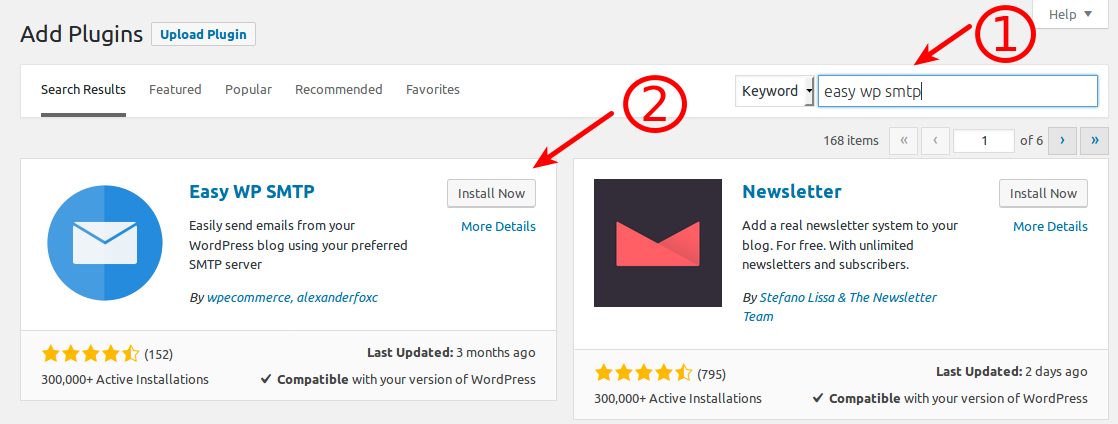
2) In the search bar, type in Easy WP SMTP and click Install Now and then Activate next to it:

3) With the plugin now active, go to the Settings in the WordPress dashboard sidebar and then click on Easy WP SMTP:

4) On that page you will need to fill in the following fields:
Here is an example of the filled in fields:

5) Click Save Changes and then click the Test Email tab near the top of the page. There you can fill in an email address before clicking the Send Test Email button:

If you receive the test email, you're all done!
Note: For external email services, the SMTP/outgoing port may need to be opened by our support first. Please contact us if you have any issue setting up SMTP with an external service.
Powered by WHMCompleteSolution